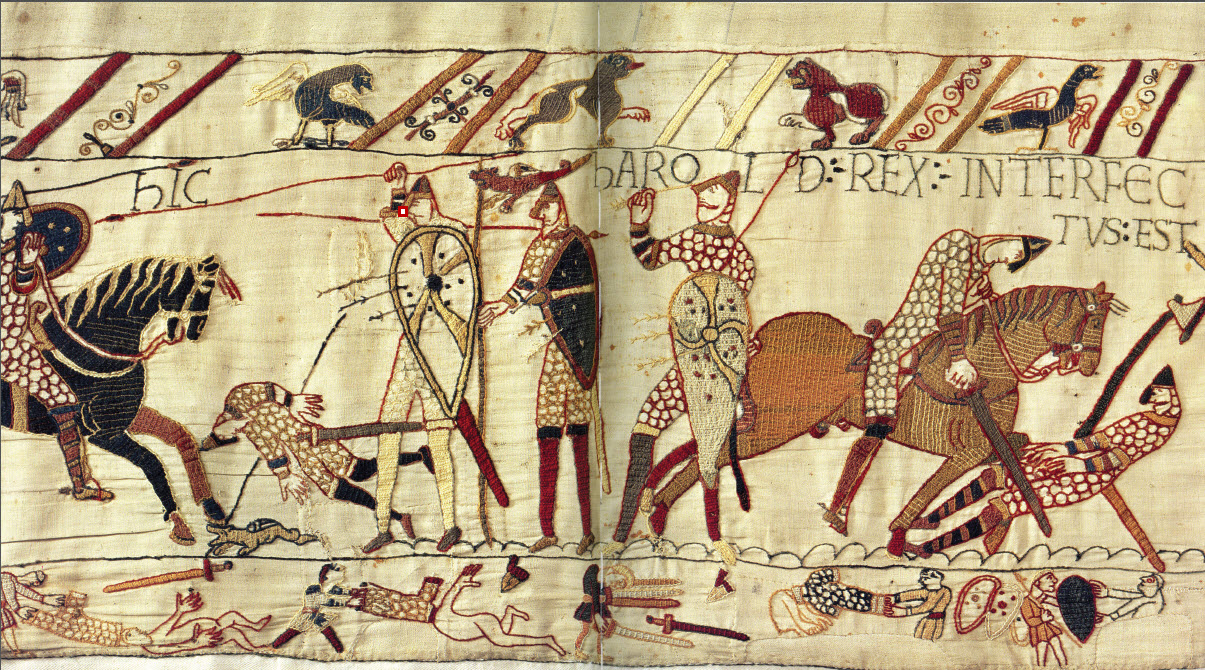
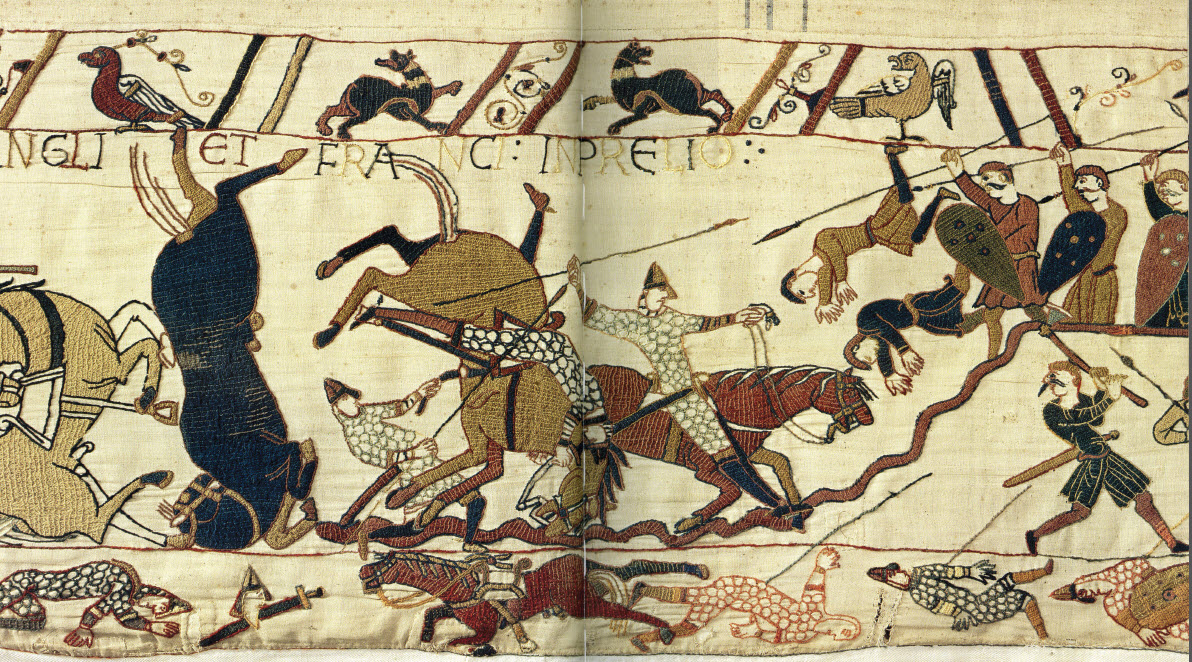
Plate 62 of the Bayeux Tapestry depicts a violent clash between armored soldiers on horses and foot. Below them, on the bottom border, lie fallen soldiers. Above the scene, in the upper border, are three birds and one bear-like animal (Wilson pl.62). There is no Latin text included in the panel. Apart of a series of panels depicting a battle, Panel 62 shows the Battle of Hastings, as William’s forces clash with Harold II’s English forces in 1066 in present-day England (History Learning Contributors). Clues about the historical meaning of the panel can be gathered from the details of armor of the soldiers. According to Wilson, the heavy armor of the men on the panel reveals it is a conflict between the aristocratic soldiers of both sides, “The whole scene must be interpreted as a conventionalized battle—a fight between the more aristocratic soldiers on each side. They are, with few exceptions, fully armed with mail-shirts and knightly armor” (Wilson 171). Additionally, it is important to note that all soldiers use spears, save one individual, who uses an arrow (Wilson, pl. 62). Thus, this panel is depicting soldiers not a part of the archery unit, supporting Wilson’s hypothesis that these forces are both aristocratic. Therefore, this part of the tapestry is indicating there was an aristocratic clash with both forces.
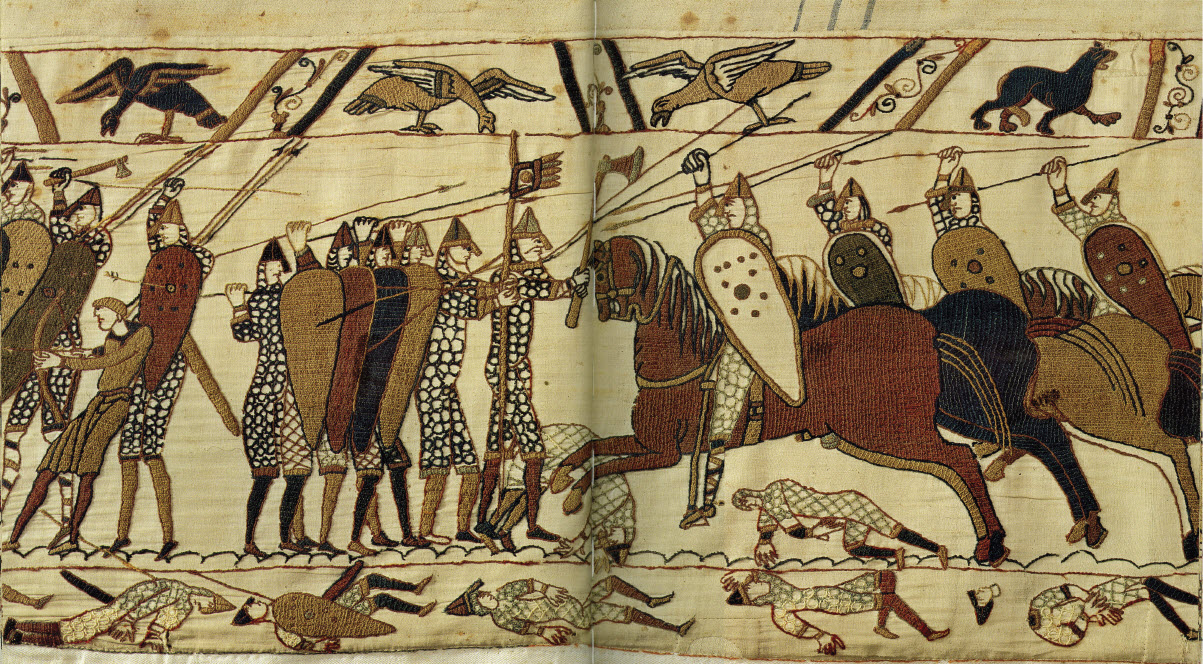
Plate 62, Wilson 171. Norman and English forces meeting in battle.
Additionally, it is important to note the inclusion of fallen soldiers, something not typical of Anglo-Saxon art. According to Wilson, “Dead soldiers are, however, rarely seen in Anglo-Saxon art” (Wilson, 171). This would support George Beech’s hypothesis that tapestry was not made in England, but rather, in France. Beech argues that according to the history in Historia Sancti Florenti Salmurensis, the tapestry was commissioned “by a certain Queen from over-seas” (Bloch 161). Thus, this evidence provided with the artistic style conflicting with the typical work of Anglo-Saxons, suggests the possibility that it was commissioned outside of England.
Panel 62 may also lend insight into military strategy of the time. While one interpretation of the panel leads to an exclusive illustration of the aristocratic portion of the armies, another reading suggests the single archer represented the full archery forces. Thus, the archers were protected by the fully-armed soldiers, who formed a line. Wilson’s also offers insights on this in his narration of the battle based on the tapestry, “The battle commences. The Norman calvary, backed by the archers, charge the English army, which consists of unmounted soldiers (including one archer who wears no armour) and which seems to be formed behind the legendary ‘shield-wall’” (Wilson).
Thus, the tapestry potentially reveals information about a perceived show-down between aristocratic forces in the battle, the origin of where it was made, as well as the battle strategies for both armies.
Bibliography
Bloch, H. (2007). Was the Bayeux Tapestry Made in France? The Case for Saint-Florent of Saumur by George Beech. Medieval Academy of America, 161.
Contributors. (2013). The Bayeux Tapestry. Retrieved from History Learning Site: http://www.historylearningsite.co.uk/bayeux_tapestry.htm
Wilson, David M. The Bayeux Tapestry: The Complete Tapestry in Color. New York: A.A. Knopf, 1985. Print.